New Vintage Audio Restoration HQ

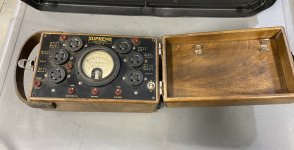
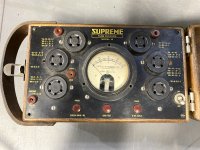
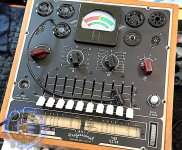
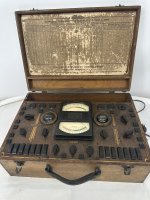
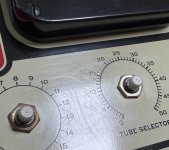
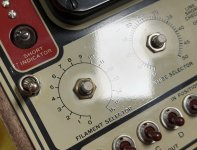
Lookie here what I scored today and is on its way to me - a 1930 Supreme Model 19 tube tester!

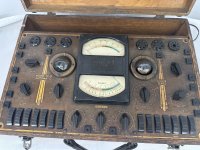
What makes this one so cool is how early it is in the evolution of tube testing. Instead of selector switches and roll charts, the tube types are printed right on the faceplate next to their sockets.

Mine still has the original wood case, leather handle, GE/Supreme meter, sockets and panel markings intact.

Now the fun part begins: receiving it and then carefully bringing it back to life!

w1.jpg
w2.jpg
 
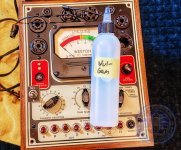
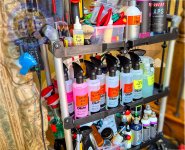
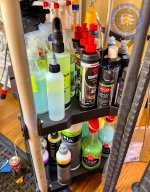
What's in this bottle mixture? About $50 worth of magic sauce.

Often time you'll see grey rings around the tube sockets and trying to clean it is near impossible. It's a different kind of soot than what is on the rest of the tester. Plus it usually extend to the area around the screws that hold the sockets in place.
After much trial and error - I got close to being able to clean that area. However it still fell short as it somewhat cleaned it bur really smeared it more than anything else.

Then I had a thought - no more water based cleaning and instead time to try a very gentle solvent. What do they use at the Louvre? What do they use at the Imperial War Museum and others?

After much research I found out: a mix of Gamsol (special high purity solvent) and Vulpex - a special soap that can be used with water or a solvent carrier.

So I mixed up a batch of 10:1 in favor of Gamsol and tried it today. It worked!
Now I'll clean it one last time with one of my favorite products that doesn't leave any film on the surface and then I'll do some hand polishing to remove some of the scratches.

DIY Audio, Greek audio geek 1.jpg
 
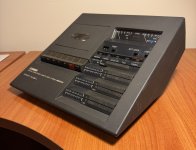
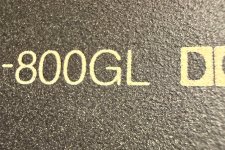
This is my latest project. Yamaha TC-800 GL. Circa 1975. This completes my MOMA (Museum
of Modern Art) audio collection. The other piece is a B&O 4002 Turntable.

Are there any other pieces of HiFi gear in their permanent collection? They have a Dieter Rams designed Braun radio that is awesome, but not really HiFi.

The casework on this one is in decent shape. Some minor wear and scuffs I will need to figure out how to clean up. The surface is textured so I am being super careful.

Any thought or ideas are welcome.

New belts will arrive next week. The disassembly and cleanup begins today.
IMG_0492.jpeg
 
This is my latest project. Yamaha TC-800 GL. Circa 1975. This completes my MOMA (Museum
of Modern Art) audio collection. The other piece is a B&O 4002 Turntable.

Are there any other pieces of HiFi gear in their permanent collection? They have a Dieter Rams designed Braun radio that is awesome, but not really HiFi.

The casework on this one is in decent shape. Some minor wear and scuffs I will need to figure out how to clean up. The surface is textured so I am being super careful.

Any thought or ideas are welcome.

New belts will arrive next week. The disassembly and cleanup begins today.
View attachment 36089
Make sure to clean the record/play switch! Best to do that with spray Deoxit in the green and black can. It leaves a non-volatile lubricant behind which is vital for the switch to work after cleaning.
 
This is my latest project. Yamaha TC-800 GL. Circa 1975. This completes my MOMA (Museum
of Modern Art) audio collection. The other piece is a B&O 4002 Turntable.

Are there any other pieces of HiFi gear in their permanent collection? They have a Dieter Rams designed Braun radio that is awesome, but not really HiFi.

The casework on this one is in decent shape. Some minor wear and scuffs I will need to figure out how to clean up. The surface is textured so I am being super careful.

Any thought or ideas are welcome.

New belts will arrive next week. The disassembly and cleanup begins today.
View attachment 36089

I have dozens of hours of experimenting with cleaning up every kind of metal, plastic, bakelite, glass and more you can think of on over 30 vintage pieces.

I've also studied a bit of the chemistry of what makes different cleaners work on different materials since the vintage stuff is so delicate compared to the newer stuff. Thankfully 70's is considered 'new' so you have more options to choose from.

We need to determine what is the dirt on the unit: smoke? Grease? Human oils? Other?

My guess is looking at it you are dealing mostly with dirts and human oils which is much easier to clean. Also the unit probably never runs hot so that helps keep the dirt from being "baked in" over time.

FIRST - take a soft brush and dust the unit getting off any big dirt particles.

Then ob the side near the bottom take a slightly damp paper towel with only a bit of water. LIGHTLY wipe once or twice and then dry and see what it looks like. If you wipe to hard you will scratch it. Being textured that rules out using any polishes.

If you can sent me a before and after I can help narrow down what cleaners you should use.
 
Back
Top