New Vintage Audio Restoration HQ

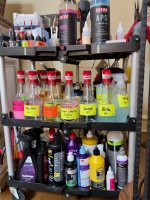
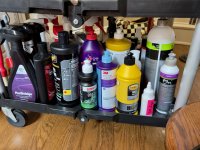
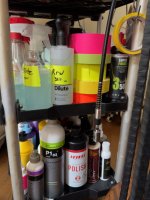
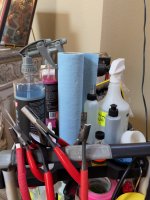
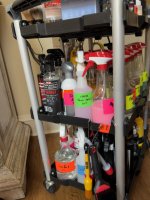
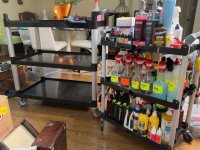
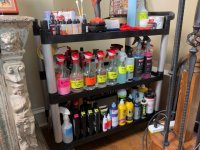
So I've spent the last 2 weeks carefully analyzing and grading the products I've bought to decide what are keepers and what to get rid of to make space.

I did great! I cleaned out about 25% of what I had.

So what to do with all that extra room on the cart?

I ended up buying double the number I got rid of to keep trying new techniques to find what works and what doesn't.

Oh, and the cart is at end of life and bending under the weight of the stuff so I have a more heavy duty one or order.

Future post: I'm now studying and understanding what makes a product more likely to work for me than not, so I can really better understand the product vs. restoration relationship.

Some VERY interesting info - in fact I'll go so far as to say the newer products are NOT better than the old school ones.

IMG_5264.jpeg
IMG_5262.jpeg
IMG_5265.jpeg
IMG_5266.jpeg
IMG_5267.jpeg
 
So I've spent the last 2 weeks carefully analyzing and grading the products I've bought to decide what are keepers and what to get rid of to make space.

I did great! I cleaned out about 25% of what I had.

So what to do with all that extra room on the cart?

I ended up buying double the number I got rid of to keep trying new techniques to find what works and what doesn't.

Oh, and the cart is at end of life and bending under the weight of the stuff so I have a more heavy duty one or order.

Future post: I'm now studying and understanding what makes a product more likely to work for me than not, so I can really better understand the product vs. restoration relationship.

Some VERY interesting info - in fact I'll go so far as to say the newer products are NOT better than the old school ones.

View attachment 36185
View attachment 36186
View attachment 36187
View attachment 36188
View attachment 36189
Yumpin’ yiminy. And I thought I was nuts. 😉
 
Accidental Learning Update!

Guys - the last 3 days I've been totally obsessed and focused on learning more about and understanding better what I stumbled into over the past few weeks.

Although I am completely fascinated by what I've learned, the wife gives me an eye roll when I enthusiastically try and explain to her. LOL

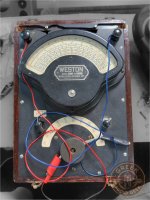
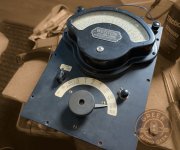
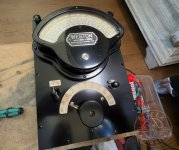
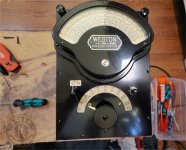
I've been restoring a 1930's Weston 774 that is the second worst faceplate I've ever encountered in terms of the amount and thickness of baked on dried into the porous paint oil, grime, nicotine and who knows what else that none of my go-to compounds would touch.

I tried a stack of products — Jescar's full line, Menzerna 1000/2500, Koch Chemie's fine and micro polishes, a couple of Meguiar's SMAT compounds and more. Nearly all of them either did nothing or just smeared the grime around without cutting it. Only a couple of products actually worked.

(Note I did initially try liquid cleaners and they didn't even make a dent in any of the grime that has hardened into a bullet-proof type cement).

That sent me down a rabbit hole, and the real breakthrough came by complete accident - the kind I find most exciting in this journey.

The accident: I sprayed a strong panel prep solvent on one of the testers to strip old product residue before working on it — something I'd used without issue on other testers. Within seconds, the black panel turned a faded, milky blue-grey. I thought I'd ruined it.

Turns out this is a well-documented phenomenon called lacquer blush — a whitish, cloudy haze that forms when a fast-evaporating solvent reacts with a nitrocellulose lacquer paint. Nitro lacquer never fully cross-links, even after decades — it stays chemically "alive" in a way other finishes don't. That's the whole reason it can be reamalgamated (redissolved and reflowed with solvent to heal crazing), but it's also why it's vulnerable to this reaction from products that were never designed with it in mind.

So I've spent days studying up on nitro lacquer as most of the other testers I have do NOT have that finish and learning about how to deal with them.

Thankfully a light mechanical polish pulled the blush out — but I learned almost every polish, compound, and glaze marketed today is built and tested against modern automotive paint systems, even when the label says "single-stage" or "all paint types." That language almost always means modern single-stage urethane, not 90-year-old nitro lacquer. As I just learned they're not the same chemistry.

What actually turned out to matter, mechanism-wise:

  • Diminishing abrasive compounds (most modern cutting compounds — Menzerna, Jescar) are designed to break down under machine-generated heat and pressure. By hand, without that heat, many of them just don't fully engage — they smear rather than cut. One exception: I found that working a diminishing compound feverishly by hand in a much smaller section, for much longer than feels natural, can actually get it to work by hand. It's slow, but it's real.
  • Fixed-abrasive "SMAT"-style compounds (Meguiar's M100, M105, M205) are often marketed as more hand-friendly than diminishing compounds, and in theory they should be. In practice I found they also didn't do too well. I don't have a clean explanation for why other than the finish is so old and fragile and also as I learned nitro actually dries out and needs to be revitalized. But I first need to clean it to be able to revitalize it.
  • Solvent-forward products — sprays, panel preps, some "chemical + mineral" compounds — carry real blush risk. Heavier, slower-evaporating carriers (like the kerosene-type naphtha in some paste compounds) seem much less likely to trigger it than fast-flash solvents like isopropyl alcohol. The water based compounds I tried did not have the ability to even touch the grime so the grime still needs solvent to break it down.
  • Oil-based "rejuvenating" glazes (Meguiar's #7 and similar) have a positive history on single-stage automotive paint. So after I am able to clean the grim off I'm going to be using M03 - a cousin of the #7.

What's actually worked for me, so far:

  • Farécla G3 and G6 paste compounds — older abrasive technology by Farécla's own admission, explicitly positioned for aged and very aged paint. Hand-safe, no water needed, no staining issues like some 3M compounds - which are darker in color - are notorious for.
  • 3M Rubbing Compound 05973 — the one product I found with an explicit "safe on lacquer and enamel" claim in its own documentation, not just "all automotive finishes." Confirmed cutting my actual grime by hand but the finish is so soft and dried out will definitely need a finishing and glaze step to remove polishing scratches.
  • Menzerna 400, worked hard in small sections — a genuine diminishing compound that does work by hand if you give it the technique it needs. However it left a *slight* blush from the solvents in it. So I've ordered the non-solvent version to try. So far the best performing.
  • Currently testing Meguiar's M02 (explicitly marketed for "older lacquer and enamel paints" — a real, written claim rather than inference), Meguiar's M03 Glaze and Menzerna 2400 (Menzerna's own FAQ singles this out as one of the few products in their range they explicitly recommend for hand use, and describes it as built for old, dry, "sticky" paint specifically).
The big takeaway: Holy crap is this far more complicated - and exciting - than I ever thought it would be!

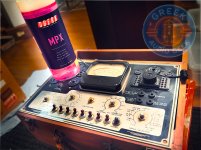
Picture of it still trying to fight the grime without destroying the paint.
Oberk.jpg
 
I'm generally a big fan of the Menzerna stuff.

It's a different kind of way to use them properly but once you get the hang of it genuinely great results.

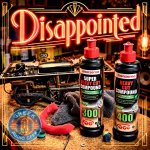
I tried the Green Line products that are solvent free to see if they performed better on finishes that are solvent sensitive.

Honestly they both were disappointing. They have not earned a place on the Detail Chariot and will be banished for life.

car detail.jpg
 
OK guys- some before and after.

I also filmed some video of the work and will be putting together a short vid on it.

Here are the steps I did (I know I am forgetting a few and the vid will show that). I always take them out of the case to restore the case separately and to allow me to attempt to restore the internals.

- Glue the top back together
- GENTLY wipe the entire unit with Rrw as it has lube in it to lightly clean while lessening the changes of scratching with the dirt
- Tried Blitz 30:1 - not strong enough. I can see it removing some of the 80 years of grime but doing a lot of smearing.
- Tried Sonax 20:1 not much better.
- Multiple applications of Jescar APC 10:1
- Then Blitz to wipe off any Remaining APC.
- M2 cleaner / cut. Not strong enough so I experimented with fine and ultra fine grades of polish only to jump back to a to 3M Medium cut polish.
- After numerous applications of that and then went to M2, then M3 (gives me cut and glaze) then M7 then Koch Chemie Grun sealant then s100 carnauba wax.

I add the s100 over the sealant as it gives it a more natural diffused rich satin look. The finish on the meter is different than the metal face (it's much softer and more delicate) so they required different techniques and application of products.

I know I am forgetting some applications but it took about 5 hours.

I also removed hand cleaned and polished each knob.

What do you think?


C1.jpg
C2.jpg
C3.jpg
C4.jpg
 
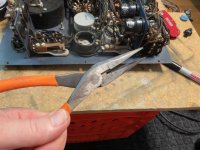
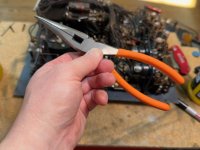
I decided to show some love to my favorite set of tools - a 35 year old set of Craftsman tools neon orange handle set.

This is just one of them I was able to clean up using a heavy rubbing compound, then a medium compound, then a semi fine compound finished with a sealant wax.

Before and after pics. took about 8 minutes using my FLEX rotary polisher with a course dense open celled foam pad.


IMG_5465.jpeg

IMG_5470.jpeg
 
I’m almost done with the cosmetic cleanup. A bit more detailing around the sliders, a bit more to tidy up but the old bird is looking pretty good.

There are only a few small actual plastic scratches and they are not very deep or noticeable. Most you can only see when the light is at an oblique angle. For something plastic and over 50 years old that’s a minor miracle. I’m very pleased with the condition of the casework. It’s good enough for me to complete the restoration.

I cleaned the transport and all the rubber components. The rubber looks good and the transport works properly, including g the motor and servo circuitry.

I still have a lot of electrical troubleshooting and alignment to do. I cleaned all the switches and pots and I have both channels playing, but the playback gain is low. As Ralph mentioned there are lot of electrolytic caps that are questionable due to age.

We are at our summer place and I don’t have any test equipment here. So I put the deck together and am listening to some old mix tapes for the fun of it.

Here is a pic of all the goods I used to clean up this deck. Not shown is the M3-0.5 tap I used to clean up one of the brass inserts that had been abused.

There was a lot of schmutz of uncertain origin that the Isopropyl alcohol dissolved. After that I tried the two Nextzett products. Cockpit Premium is the bomb. Nectar of the gods for plastic.

Switches got flushed out with CRC cleaner, then D-50, then D100. Faders and pots got D100 then F 100 Faderlube.

I went through several hundred cotton swabs and dozens of cotton balls


The end result looks pretty good.

How is the restoration progressing?
 
How is the restoration progressing?
It’s on hold for now as I finish calibrating the theater.

The next phase is component replacement and I’ll need a really good desoldering tool. I’m researching them now. I’m also building a parts list based on the schematic and what I think will need to be replaced. This thing is chock full of electrolytic capacitors and they are all suspect.
 
Back
Top