New Vintage Audio Restoration HQ

Dang! That's impressive. You work with a dust mask, right?
Thank you Ralph.

I'm very happy with how it looks. Just a bit more touch up and it will be ready for me to apply a finish.

I sand outside and my sander has a vacuum attachment on it. However I am extremely allergic to mold and mildew so even outside on this one I wore a 3M respirator.
 
Looks good Michael. I can't wait to see it with some finish on the wood.
Thanks!

I'm thinking I may do a little darkening of the wood, then depending how it turns out I'll either use the Gilboy's Hard Wax Oil of the Tried & True.

Gilboys goes on a bit clearer and T&T goes on darker. So I'll see if after I tweak the wood color I want a more transparent final finish or not.

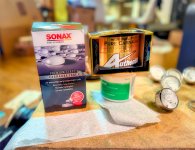
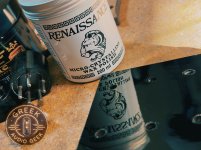
I also received two new waxes to try on the chrome dials after I clean them up with the waxes I received last week. One is representing Japan and one from Germany....

Wax.jpg
 
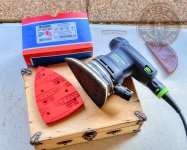
So I used for the first time over the last day SurfPrep sponge sandpaper.

I had bought some before, tried it and didn't like it.

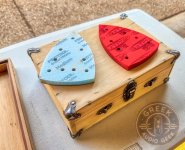
Since then I educated myself more about it and have since learned not all sponge sandpaper is the same. There are differences in foam density and such which can make a huge difference.

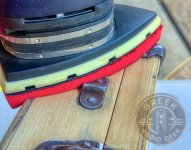
Well I tried a different brand today - the red one which is from SurfPrep vs. the Blue ones I previously tried from Festoo.

Big difference in user experience and results.

Needless to say I really like the SurfPrep and now have a box of the Festool I won't use. LOL

A2.jpg

a3.jpg
a4.jpg
 
Last edited:
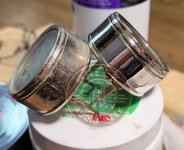
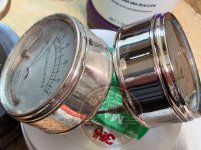
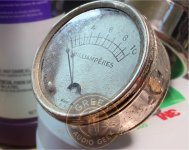
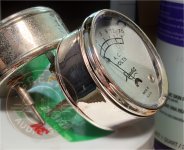
Some comparisons of my chrome restoration on the unit. All done with hand polish and time.....

I'm still not finished. I will polish with a hand glaze then wax. I will likely try several waxes to see if they impart a different look.

I completely disassembled the gauges so I could also clean the gauge face and also polish the inside of the glass which was filthy with caked-on dirt.

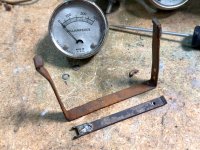
Last pic is a before and after of one of the metal brackets.

I applied a stain I custom mixed to the wood, let it dry and then spent an hour going back and forth on which finish to use.

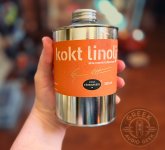
I decided to use one I haven't used before: an imported Swedish cold pressed linseed oil.

I just applied the first coat and will apply a second coat in 3 days. I'm going to make you all wait for pics. :)

C0.jpg
C1.jpg
C2.jpg
C4.jpg
IMG_5719.jpeg
 
Update for today:

I finished polishing all the gauges did another wipe down on them all.

Then I applied M07 glaze by hand, wiped it off then applied the first layer of wax.

I decided to apply Pinnacle Souveren Carnauba wax.

I'm going to give it 24 hours to set (I did wipe it all off) then tomorrow I'm going to top it with the soft99 wax I just received from Japan.

I stained the wood my custom color and decided to apply in imported Swedish cold pressed BLO. I applied it by 3M white pad, let it sit 5 minutes or so, then make sure to wipe it all off for a nice, even thin coat.

This is what I used.


Oil.jpg
 
OK guys - update:

- I've stripped the cloth covering;
- Sanded down all the mold;
- Removed the rust from the hardware;
- Glued the box to add rigidity;
- Chose NOT to fill in the cracks and such and instead want to accentuate them for character;
- Mixed up and applied a custom stain;
- Applied the hand rubbed finish of my choice;
- Disassembled the faceplate;
- Cleaned the underneath and the front;
- Use a pre wax cleaner on the faceplate;
- Applied a glaze;
- Just finished adding the second coat of hand rubbed wax on it;
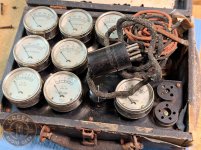
- Completely disassembled the gauges;
- Hand polished them until I brought the chrome back to life;
- Polished and cleaned up both sides of the glass on the gauges and reassembled them;
- Applied a glaze to the gauges;
- Then today added the first layer of wax on the gauges;
- I cleaned up the wires enough to stay on as vintage (though not to be used for safety reasons);
- Applied 5 steps to the tube sockets to clean them up;
- used a jeweler's brush to hand clean the tube adapter prongs.
-Removed the large dial and cleaned, polished and waxed it;
- Lubed the dial shaft and cleaned the wiper arm underneath from oxidation and grime.

Tomorrow I will add the third layer of hand applied wax to the faceplate and the second layer to the gauges.
I will then reassemble all the jacks back onto the faceplate which I removed so I could clean under them and hand polish each one.

The two pics here:

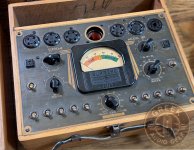
First one is to remind you how I received it.
Second one is a teaser pic of the faceplate as of now...
DC 1.jpg

Tease.jpg
 
Ok guys - had to take a step back.

The inside of the unit was painted all black and it looked ok to me vs the outside you saw pics of before.

I was having issues breathing and my eye would start to bother me very quickly around it until I realized the black paint on the inside was concealing mold.

I actually thought how dumb of me to think the outside was as bad as it was yet the inside would be ok. Pretty silly.

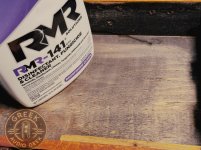
So I scrubbed it down with RMR which also removed a lot of the paint (which is fine), and let it dry over night. I don't just want to sand it off, I want to kill and sanitize it. My OCD would accept nothing less.

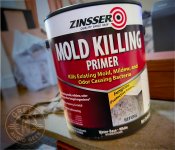
I usually use mold BLOCKING primer on the inside of these units, but I ordered some mold KILLING primer to apply instead. That should be arriving today.

I want to make sure this is 100% clean and ready to go.


Interior.jpg
 
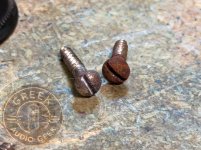
Going to hit the inside of the wood case with this tomorrow. Also I even hand scrubbed and cleaned the 8 wood screws so I can use ALL ORIGINAL PARTS when I put it back together.


S1.jpg

M1.jpg
 
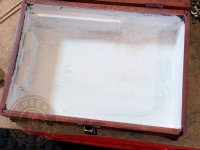
Brushed on two think layers of the mold killing paint.

It was THICK stuff - like tar.

I'm going to spray paint over it satin black the parts that you'll be able to see when looking down on the faceplate in several days - I need to give the finish on the wood time to cure further before I mask it off with tape so I don't get black paint on it.


White.jpg
 
The latest finds to land:

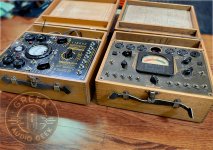
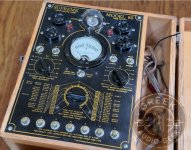
**FIRST UP: A 1934 SUPREME MODEL 85 TUBE TESTER**

This is the earlier, first-generation version (1934) featuring the original ROUND meter, before Supreme transitioned to its more familiar fan-shaped meters.

And it is in MINT condition. As in I seriously think it's literally never even been used. I base this less on the outside condition and more on the inside. It' freaking pristine. Not as in someone cleaned it up - but as in never used.

⚡
**NEXT UP: A SUPREME MODEL 501 AUTOMATIC TUBE TESTER — CIRCA 1937–1938!**

Now THIS is another fascinating piece of history.

The Model 501 featured Supreme's advanced multi-testing system. It offer five different checks, including tube quality, shorts, leakage, open elements, and individual sections of multi-section tubes.

But what makes THIS particular restoration especially interesting is its beautiful ANTIQUE BRONZE faceplate.
And that presents an entirely different restoration challenge.

This isn't simply a bare brass plate that can be polished until it shines. It's a carefully finished surface with a distinctive antique bronze appearance that will easily and quickly be destroyed with typical metal and brass cleaners.
Even many car polishes contain solvents that will permanently ruin the finish.

I can't WAIT to dig into these two beauties and share their restoration challenges.

At some point, I really AM going to have to start selling a few of these restored treasures not because I don't love them but. BECAUSE I'M RUNNING OUT OF ROOM IN THE HOUSE!**
😂
😂
😂


N1.jpg

N2.jpg

N3.jpg
 
Back
Top