atmasphere
Active member
If you keep this up there's a good chance it will look better than when it was new...
If you keep this up there's a good chance it will look better than when it was new...
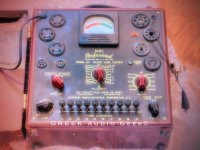
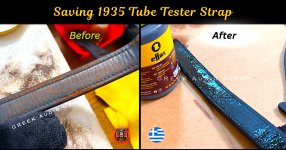
I have and you're right - I would never trust them due to age. I think that would be an accident waiting to happen.Had you considered having someone make a strap for you? If the leather is rotted it can give away without warning.
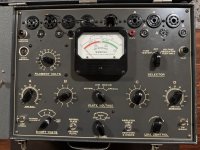
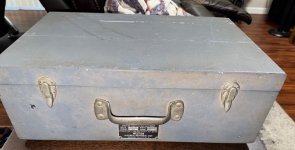
Fabulous tester! I'd be tempted on something like that to give the case a nice vintage finish such as a wrinkletex battleship gray finish.Pretty excited about today's score.
After months of looking for the right one at the right price, I got a Weston 798 1940's tube tester.
Very different than Hickok's, many feel it's more accurate than the Hickoks. I can't say if that is true or not, however it DOES use a 5KHz signal feature, and the Weston testers place higher voltage on the plate of the tube which is supposed to give it more accurate readings.
I will also say when the FAA bought tube testers to be used in the towers and airplanes, they went with the Weston version, not Hickok.
It's right on that line of being new enough to test a very wide range of tubes I use, while still being old enough to get the variety of 4 pin tubes I have.
As testers moved into the 1950's, many of them dropped 4 pin sockets all tougher (think 2A3, 45, 300B). Or if they didn't drop the 4 pin, it was a secondary function so the testing of those tubes wasn't the most accurate.
This one has a very good faceplate, the owner sent me pics of it on the multimeter so I know it's accurate and working, AND - my favorite part - the outside metal case needs LOTS of TLC. I'll defiantly be working some magic on the case.
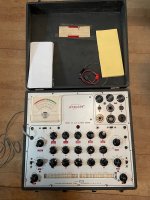
Fabulous tester! I'd be tempted on something like that to give the case a nice vintage finish such as a wrinkletex battleship gray finish.
This is one I've had on hand for a while; not as nice as that but is a true transconductance tester:
View attachment 34798
Correct. Seems like most of the wood pieces I've gotten from the 30's are an old version of lacquer which mimics today's Spar for sure.The prewar test gear I've seen often had a finish that looked like spar varnish.
That Supreme is in amazing condition!
Last night I began servicing my Precise 111. The interior of the cabinet smells like an old cabin. I assume that is due to mold but it looks fine. Any hints on treating the cabinet? Its wood with a tolex exterior which seems in pretty good shape.
The guts of the tester look good too. The meter is OK and the transformers are good, but it won't show the actual transconductance test. The tube rectifiers are good; I've tested all the resistors and replaced a couple that were off value and replaced a few capacitors that were clearly suffering. But that was just refurbishment and not trouble shooting. So I've got a bit of homework ahead yet.
Wow! That must have been an amazing course.My dad took a course that Mr Frid taught, and reproduced a few of his iconic works. Tage was a true master woodworker, and apparently a wood finisher too! My dad hated doing the finishing of some of his pieces, and would pay a professional to do the finish. (My dad was an orthopedic surgeon, so time was usually an issue prior to his retirement)


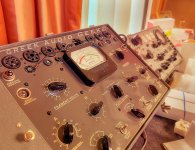
I'd be looking for a replacement on ebay. These are NOS and look like they need cleaning. You might want to measure the mounting ear dimensions (the center to center of the screws on either side of the socket) on the tester to see if these are correct.My new-to-me 1947 Weston tube tester arrived recently, and tonight was its big debut.
Powered it up — boom! — that beautiful green pilot lamp lit up like a vintage emerald.
Checking line voltage and......Perfect. Good start.
Then I carefully consulted the tube chart, dialed in the settings for a Type 45, double-checked everything, inserted the tube, flipped the “Test” switch and…
Nothing. Dead.
No movement. No reading. No hint of life.
Now I know that 45 is solid — it tests strong on my other testers.
Okay, no problem, maybe that one was just feeling shy. I grab another 45, set it up, flick the switch and… same thing. Nada.
Hmmmm.....
I switch the settings over to a 2A3, drop that in, hit the test switch… and again, nothing.
At this point, I’m thinking, “Alright, something’s up with that 4-pin socket.” So I pop in a Type 80 rectifier (same socket) — it tests! But the reading’s off. Definitely not behaving as it should.
Next, I try a 6SN7 on a completely different socket — and it tests perfectly. The plot thickens.
I reach out to my West Coast Tube Tester Buddy and he gives me a few troubleshooting ideas.
After some testing and probing, turns out, one of the four internal prongs in the 4-pin socket — the ones that grip the tube pins — is missing or shifted. That explains why 4-pin tubes aren’t making proper contact, but the 6SN7 works fine on its own socket.
So… next step?
Open-heart surgery on a 1947 Weston.
View attachment 34850

