- Thread Author
- #1
i was bored one weekend not too long ago, and i was in the market for new equip rack. so after researching and learning that there is absolutely no place to get quality wood in my area i thought id try to make a rack out of stuff i can find at home depot.
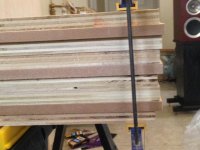
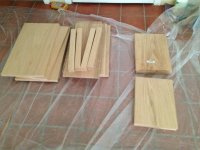
this was a rush job too as i only had sat and sun to complete this. first trip to the store i picked up 2 sheets of maple ply think it was 13/16" thick and i also picked up 3- 2'x4' pieces of 3/4" thick mdf. i had the lumber guy cut the 2 sheets of ply in 8- 2'x4' pieces , since its freeto get it cut why not? easier to carry and get home.
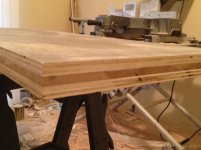
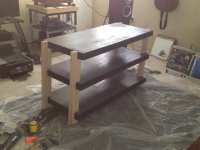
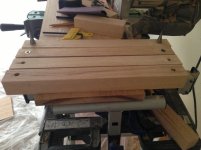
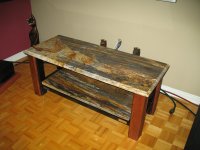
so saturday morning i stacked all these pieces so that it was 3 shelves measuring 2'x4' top and bottom maple and center of mdf. i wood glued and finish nailed everything and stacked them and clamped them. while they were drying i went back to the store and picked up some red oak 1x4's. i did not want to use this because its so hard to cut without splitting. but thats all they had in solid wood. so i came back and cut them to size for 8 of the same size pieces and glued 2 together for each leg. i didnt spend too much tim on the legs because they are only the temporary legs until i find a solid piece that is 2x4 size.
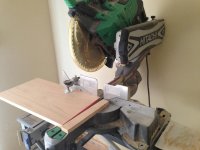
after that i cut the shelves on a table saw to 20"x 46" so i had cutoffs from each side to make them smooth. which is a nightmare by yourself when these shelves weigh like 60-70 lbs each. but i did it , on the last cut i burnt up my table saw.lol it was old so no biggie but i had to make the last cut with a circular saw. which never comes out perfectly straight. used that cut as the bottom rear of the rack. problem was now i could not use a dado blade to cut the notches for the legs, so i had to use a jigsaw, on hard oak that is near impossible to get them straight. thats when i decided the legs were temporary.lol.
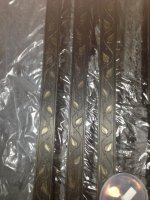
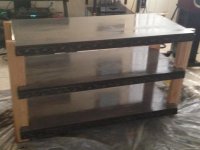
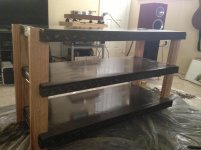
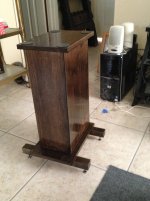
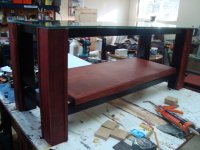
anyway i had also picked up some really cool carved leaf trim pieces and since it wasnt tall enough i got a little dot banding to put on top of it . to cover the sides, and got gray stain (which i never saw before) for the shelves and black stain for the trim, and some clearcoat satin acrylic for the finish.
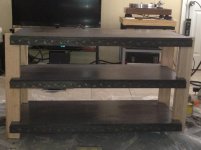
i only did one coat of each to give it an older look and not brand new and shiny. the legs were screwed on then i added the trim, put some oak plugs in the holes for the screws. since the legs are temporary i did not waste time making them perfect. now when i find the right wood i can drill out the plugs and unscrew them and add the new legs. will make things much much better. but this is fine for now and id have to guess weighs in at around 200lbs.
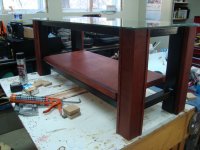
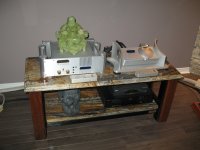
it is solid and floor vibrations do not skip any records anymore. i tried with some old records.
oh yea for the feet i just screwed on some rubber furniture feet for now.
thanks for looking. im no woodworker but i try like hell.
this was only a test. i have a much better design in mind for the next one.
sorry so long winded, i tend to do that alot.
this was a rush job too as i only had sat and sun to complete this. first trip to the store i picked up 2 sheets of maple ply think it was 13/16" thick and i also picked up 3- 2'x4' pieces of 3/4" thick mdf. i had the lumber guy cut the 2 sheets of ply in 8- 2'x4' pieces , since its freeto get it cut why not? easier to carry and get home.
so saturday morning i stacked all these pieces so that it was 3 shelves measuring 2'x4' top and bottom maple and center of mdf. i wood glued and finish nailed everything and stacked them and clamped them. while they were drying i went back to the store and picked up some red oak 1x4's. i did not want to use this because its so hard to cut without splitting. but thats all they had in solid wood. so i came back and cut them to size for 8 of the same size pieces and glued 2 together for each leg. i didnt spend too much tim on the legs because they are only the temporary legs until i find a solid piece that is 2x4 size.
after that i cut the shelves on a table saw to 20"x 46" so i had cutoffs from each side to make them smooth. which is a nightmare by yourself when these shelves weigh like 60-70 lbs each. but i did it , on the last cut i burnt up my table saw.lol it was old so no biggie but i had to make the last cut with a circular saw. which never comes out perfectly straight. used that cut as the bottom rear of the rack. problem was now i could not use a dado blade to cut the notches for the legs, so i had to use a jigsaw, on hard oak that is near impossible to get them straight. thats when i decided the legs were temporary.lol.
anyway i had also picked up some really cool carved leaf trim pieces and since it wasnt tall enough i got a little dot banding to put on top of it . to cover the sides, and got gray stain (which i never saw before) for the shelves and black stain for the trim, and some clearcoat satin acrylic for the finish.
i only did one coat of each to give it an older look and not brand new and shiny. the legs were screwed on then i added the trim, put some oak plugs in the holes for the screws. since the legs are temporary i did not waste time making them perfect. now when i find the right wood i can drill out the plugs and unscrew them and add the new legs. will make things much much better. but this is fine for now and id have to guess weighs in at around 200lbs.
it is solid and floor vibrations do not skip any records anymore. i tried with some old records.
oh yea for the feet i just screwed on some rubber furniture feet for now.
thanks for looking. im no woodworker but i try like hell.
this was only a test. i have a much better design in mind for the next one.
sorry so long winded, i tend to do that alot.